The cut you’ve been making is the reason they keep coming back
Walk past most rose gardens in early May and you’ll find at least one bush with a long, vigorous, suspiciously healthy-looking stem shooting up at an awkward angle from the base. The leaves are a slightly different green. The thorns are sharper, more numerous, set differently along the stem. If left alone, that stem will outgrow the rest of the plant by July, flower in tiny five-petalled white or pink clusters in August, and slowly take over.
That’s a sucker. It’s not part of the rose you bought. It’s the rootstock — a different rose species entirely, grafted underneath your variety to give it vigour, disease resistance, and a strong root system — pushing up its own growth.
Most gardeners deal with suckers exactly the way they’d deal with a dead twig: snip it off at soil level with a clean pair of secateurs, feel virtuous, move on. Six weeks later there are three new suckers in roughly the same spot. After a couple of seasons of this, the bush is half rootstock, the named variety is sulking, and the whole bed looks like a thicket of mismatched leaves.
The problem isn’t that suckers are unkillable. It’s that the standard cut you’re making is actively making them multiply. To stop the cycle you have to understand what’s underneath the soil — and reach for a trowel before the secateurs.
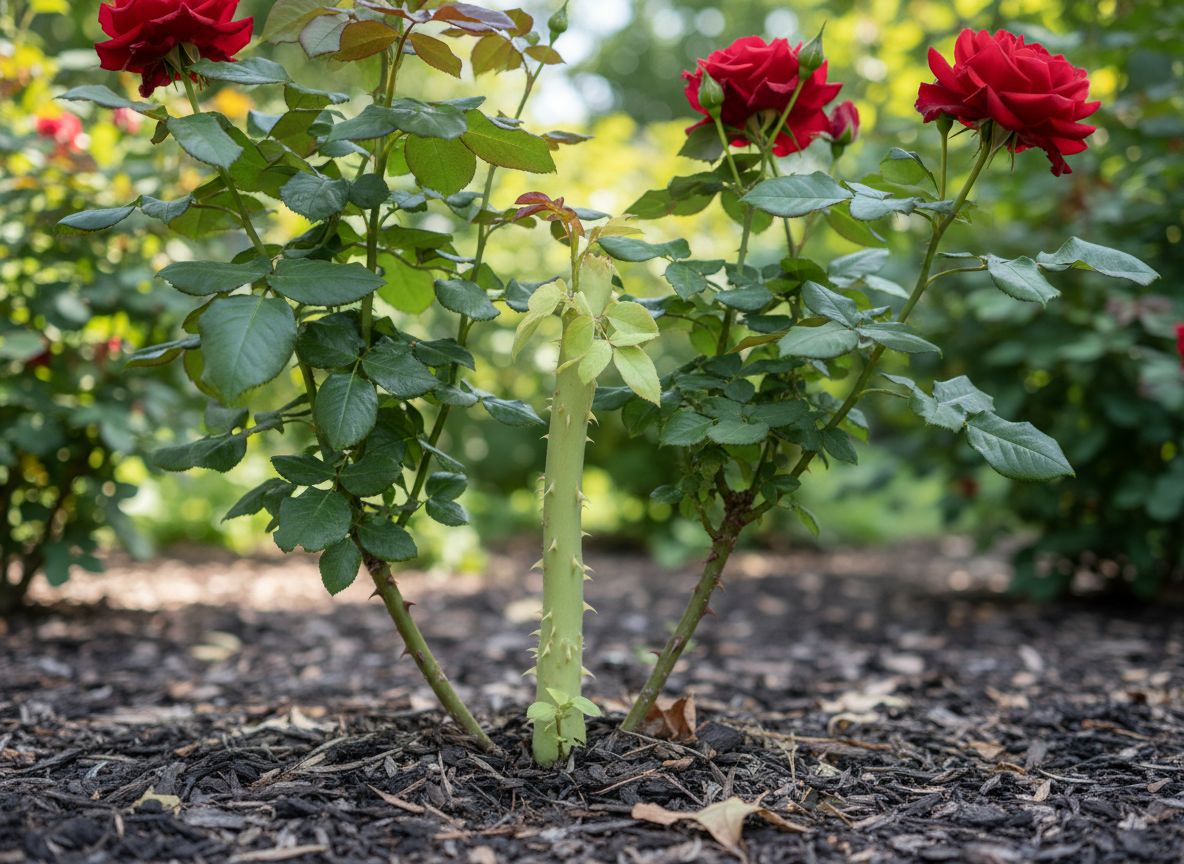 A thorny rose sucker grows from the base of a rose plant — AI-generated illustration
What a sucker actually is
Almost every rose sold in a garden centre is two plants, joined at the hip. Below the soil line is a rootstock — most commonly Rosa laxa, R. multiflora, or R. canina in Europe — chosen for its tough roots and reliable establishment. Above the soil line is the named variety: your ‘Munstead Wood’, your ‘Gertrude Jekyll’, your ‘Iceberg’. The two were joined together in a nursery field, usually by chip-budding, eighteen months to two years before you bought the plant.
The point where they meet is called the graft union or bud union. On a healthy modern rose it’s the swollen, slightly knobbly knuckle at the base of the stems, just above where they enter the soil. Everything growing out of the plant from that knuckle upward is the variety you paid for. Everything growing from below — from the rootstock proper — is a sucker.
Rootstocks are chosen partly for vigour, which is exactly why they’re prone to suckering. Left to their own devices, R. laxa and R. multiflora will happily send up new shoots from anywhere along their root system. Inside the nursery they were trained not to. In your garden, three years later, all the genetic enthusiasm for self-propagation comes flooding back.
Why May is when you’ll see them
Suckers can appear at any time of year, but May is when the soil warms above ten degrees, root activity ramps up, sap pressure peaks, and any dormant buds on the rootstock are most likely to break.
If you’ve fed and mulched generously, you’ve also given the rootstock a fertility boost. Heavy nitrogen in particular pushes vigorous root growth and primes the rootstock for suckering. So does anything that physically damages the roots: a fork driven in too close, a careless transplant, a season of severe drought followed by heavy spring rain. Damage triggers the rootstock’s survival response — push new shoots fast, photosynthesise hard, recover.
This is the moment to walk every rose in the garden and look at the base. The suckers you find now, in the first week of May, are easier to deal with than the same suckers in mid-July when they’ve thickened to pencil width and rooted in deeper. Catch them small, deal with them properly once, and you usually won’t see them again from the same point next year.
How to tell a sucker from a perfectly normal new shoot
The internet is full of identification rules of varying reliability. The one you’ll see most often is the leaflet count: rose leaves grow in odd-numbered groups, and the claim is that suckers have seven leaflets per leaf while the named variety has five. This is sometimes true and sometimes not. R. canina rootstock often does produce seven-leaflet leaves, but plenty of named varieties — including most of the David Austin English roses — naturally show seven or even nine leaflets on healthy shoots. Counting leaflets is a clue, not proof.
The same goes for leaf colour, thorn density, and stem colour. A sucker tends to have paler, more matt leaves and finer, more closely spaced thorns than the variety above the graft. But seasonal vigour, water stress, and varietal variation can all make a normal shoot look “different enough to worry about” without it being a sucker.
There is only one identification test that’s never wrong, and it’s mechanical rather than visual.
Trace the shoot back to where it emerges from the plant. If it joins the bush above the graft union — above that knobbly knuckle — it’s part of the named variety. Leave it alone. If it disappears into the soil and emerges from somewhere below the graft union, or from a root running away from the main plant, it’s a sucker. Remove it.
To do this properly you almost always have to scrape away a few centimetres of soil and mulch around the base. That’s not a problem; that scrape is the first step of the removal anyway. If you can clearly see the shoot joining the rootstock below the union, you have your answer. If you can see it joining the bud union or above, you don’t have a sucker — you have a basal shoot, which is the most valuable kind of new growth on the entire bush, and you should leave it strictly alone.
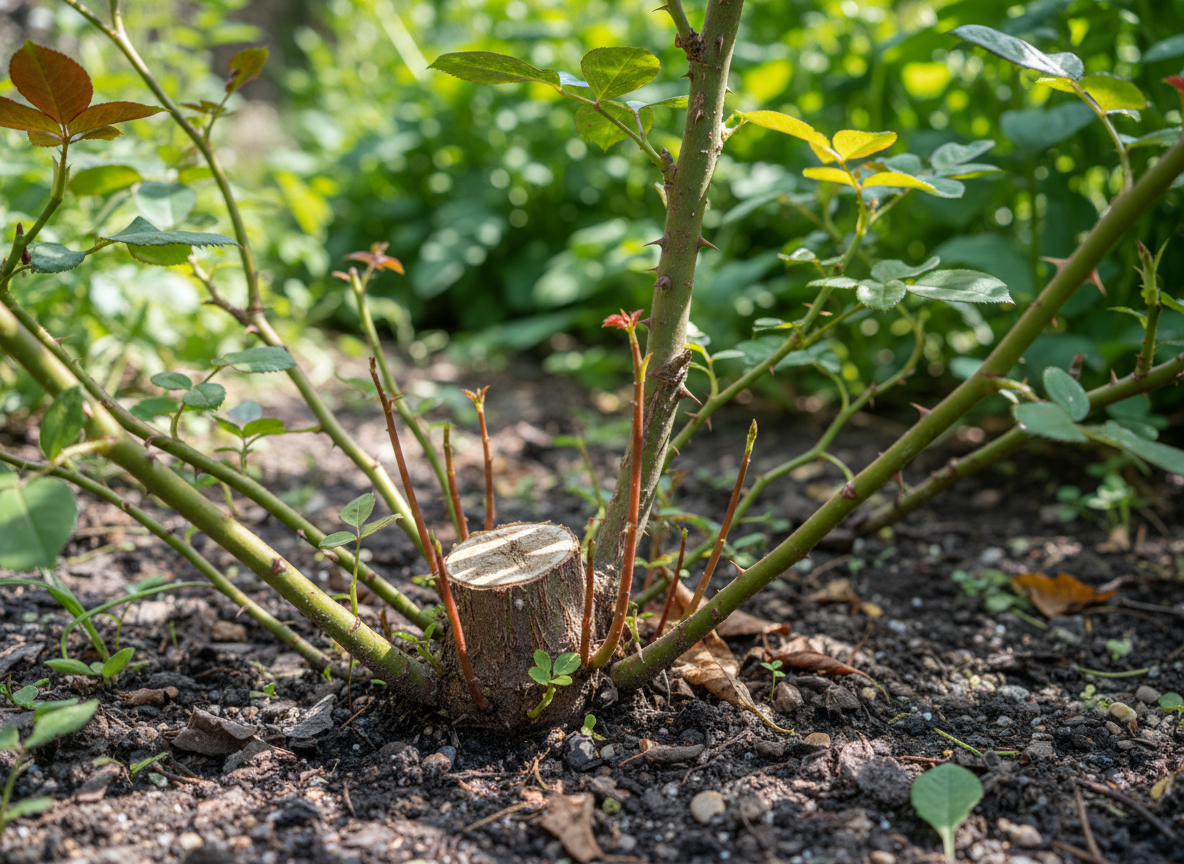 A rose bush with suckers growing from the base of a pruned stem — AI-generated illustration
Why a clean snip at soil level multiplies the problem
Here is the part that surprises most gardeners. A sucker is not equivalent to a normal stem. It grows from a cluster of adventitious buds — dormant cells embedded in the cambium layer of the rootstock, capable of becoming new shoots when they receive the right hormonal trigger. When you slice the visible shoot off cleanly at soil level, you remove the visible part of the stem but you leave the entire bud cluster intact, undamaged, and now hormonally instructed to fire.
The mechanism is straightforward. While the original sucker shoot was growing, the auxin produced at its tip suppressed the dormant buds around its base — the same apical-dominance system that keeps a sweet pea growing as a single stem until you pinch the top. The moment you cut the shoot, the auxin signal stops. Within hours, the suppressed buds in the cambium below the cut start to swell. Within ten to fourteen days, two or three new shoots have broken the surface. The result is more suckers than you started with, growing faster than the first one, and the cycle compounds every time you cut at the wrong place.
This is the same principle that makes hedging work. Cut the tip of a privet, and the dormant buds along the stem break and thicken the hedge. Cut the tip of a rose sucker, and the dormant buds along the rootstock do the same thing — except in this case the thickening is exactly what you don’t want.
The only way to stop the cycle is to remove the bud cluster itself. That means going below the soil line, finding the joint where the sucker meets the rootstock, and physically tearing the shoot off so that the surrounding cambium tissue — and the dormant buds it contains — comes with it.
The Royal Horticultural Society makes this point explicitly in its sucker guidance: cuts encourage regrowth, while a tearing action removes the basal buds and reduces the chance of more shoots from the same spot. Every reliable nursery and rose breeder I’ve checked — including David Austin, the largest specialist rose grower in the UK — gives the same advice in the same words. The technique is universally agreed; it’s just rarely communicated to home gardeners.
The tear-don’t-cut technique, step by step
The technique is straightforward but it’s not how you’d instinctively prune. Plan to spend ten minutes per affected bush, in dry weather, with the soil moist enough to crumble rather than dust.
1. Identify the joint before you do anything else. Push back the mulch from the base of the rose. With a hand fork or trowel, gently scrape away soil for ten to fifteen centimetres around the bush until you can see where the sucker stem disappears into the rootstock. You’re looking for the precise point where the suspect stem meets the woody root. Don’t cut, don’t pull, just expose.
2. Confirm it’s below the graft. Now look at the relationship between that join and the bud union — the swollen knot where the named variety meets the rootstock. The sucker join must be below the union. If it isn’t, stop and think again; you may be about to remove a basal shoot.
3. Get a firm grip on the sucker, low down. Wear thick leather or thorn-proof gloves. Grasp the sucker as close to the rootstock as you can manage, ideally below where any side branches have started.
4. Pull sharply downward and outward. Don’t twist; tear. The aim is to peel the sucker off the rootstock and bring a small wedge of the cambium with it. There will be a soft tearing sound and the sucker will come away with a slightly ragged, fibrous base rather than a clean cut. That ragged base is the point — it means you’ve taken the dormant bud cluster with the shoot.
5. Inspect what came off. A correctly torn sucker has visible cambium tissue and small bumpy growth points at its base — those are the buds you’re trying to remove. A cleanly snapped or cut sucker is a partial job; if there’s any doubt, look back at the rootstock and use a sharp knife to pare off any obvious remaining bumps level with the surrounding bark.
6. Backfill and tamp. Replace the soil around the rootstock, firm it gently with your foot, and re-mulch. Don’t fertilise the spot for at least a month — you don’t want to push more rootstock vigour right where you’ve just disturbed it. A light watering helps the cambium close.
The first time you do this it feels brutal. You’re tearing live tissue off a plant you paid £20 for, surrounded by visible damage to the rootstock and soil. It looks worse than a cut. It is exactly the right job.
A correctly torn sucker rarely regrows from the same point. A clean-cut sucker almost always does.
What about suckers two metres from the bush?
Standard, weeping, and tree roses are grafted higher up the stem, sometimes 90 cm or more above the soil. Their rootstocks behave differently to bush roses: suckers can emerge from anywhere along the underground roots, sometimes one or two metres from the trunk. You’ll see a vigorous, awkwardly placed shoot in the middle of the lawn, the gravel path, or the next-door bed.
These long-range suckers can’t always be torn at their origin without serious excavation. The pragmatic approach is to follow the shoot back to the parent root with a hand fork, expose the joint, and tear there. If the joint is genuinely too deep or too far to reach, the next-best option is to grasp the sucker low and pull it sharply at the surface — the pulling action is more effective than a clean cut even where you can’t reach the cambium itself, because it tends to fracture the bud cluster rather than leave it intact.
For long-bedded suckers from a tree rose’s roots, accept that you’ll be doing this annually for a few years. The rootstock has a lot of root mass and a lot of dormant buds. Each one you tear out is one you don’t have to deal with again, and the population of active buds reduces over time.
Own-root, patio and standard roses behave differently
Not every modern rose is grafted. The picture has changed in the last decade.
Own-root roses are propagated from cuttings of the named variety itself, with no rootstock at all. Many specialist growers — Heirloom Roses in the US, Style Roses in the UK, an increasing share of David Austin’s container range — sell own-root plants as standard. On these, anything growing from the base is, by definition, the named variety. There is no rootstock to sucker from. If you’re certain your plant is own-root, leave every basal shoot alone; they’re free new canes you don’t have to worry about. Check the supplier’s catalogue page — most own-root growers say so explicitly.
Patio and miniature roses sold in flower for instant impact are usually own-root too, propagated from softwood cuttings under mist in a polytunnel. Same rule applies.
Standard roses — the lollipop trees with a clear stem and a head of named-variety growth at the top — are grafted twice: once at soil level (where the rootstock root meets the rootstock stem) and once at the top of the stem (where the rootstock stem meets the named variety). They sucker from both points. Anything growing from the trunk between the two graft points is rootstock and needs to come off; anything growing from the head above the top graft is the variety. Treat the lower graft like a bush rose; rub off any buds breaking on the trunk itself with your thumb as soon as you spot them.
Climbing roses are usually grafted in the same way as bush roses, with the union at soil level. Same rules.
If you don’t know whether your rose is grafted or own-root, the test is the same as for sucker identification: look for the bud union. A swollen, knobbly joint at or just below soil level means grafted. A perfectly straight transition from root to stem means own-root.
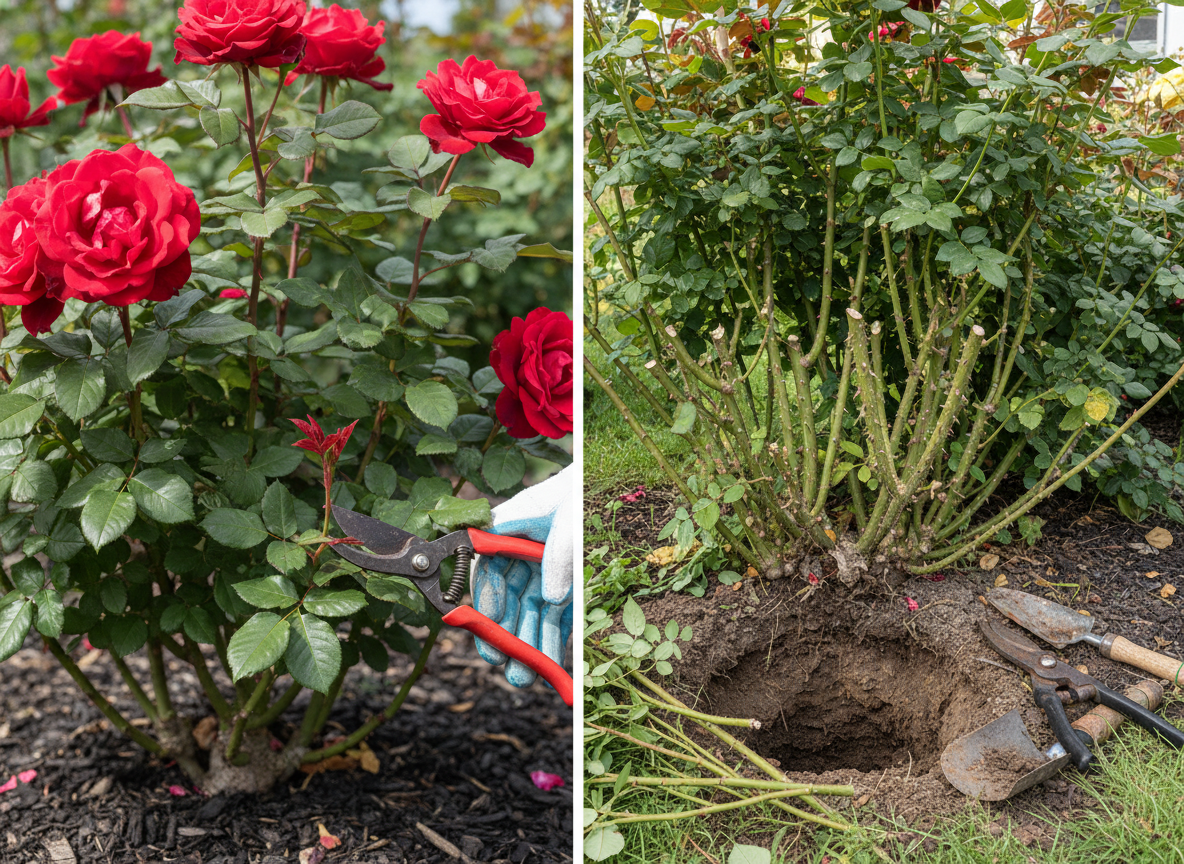 The image depicts a rose bush with a gloved hand pruning a sucker and a rose bush with exposed roots and gardening tools — AI-generated illustration
Why prevention matters more than removal
A rose that has suckered once is more likely to sucker again, simply because the rootstock has been disturbed and the adventitious buds have been activated. Three habits keep the population low.
Plant the bud union at the right depth. In cold climates (most of the Netherlands, the northern half of the UK) plant with the union 5 cm below the soil surface to protect it from frost. In milder areas leave it just at the surface. A union planted too high makes the rootstock visible and tempting; a union planted too deep encourages roots from the named variety, which is fine, but also keeps the rootstock under more pressure to compensate. Either extreme increases sucker rates.
Don’t damage the roots. Mulch heavily rather than digging at the base. Forking weeds out close to the bush is one of the most reliable ways to trigger suckering — cut weeds off at soil level instead, or pull them with their roots intact while the soil is moist. The fewer cuts in the rootstock root system, the fewer dormant buds are activated.
Watch the watering. A long dry period followed by a sudden flood — typical late-spring weather in north-western Europe — is one of the strongest sucker triggers. Mulch buffers soil moisture; a permeable five-centimetre layer of bark or composted manure keeps the moisture stable underneath without smothering the bud union.
If you’re in a region with consistently late frosts, also consider whether your rose’s rootstock matches your soil. R. laxa tolerates clay better than R. multiflora, which dislikes wet feet and reacts to bad drainage by suckering aggressively. A mismatch you can’t easily fix is one more reason to check origin labels before you buy.
A note on the second rule of sucker management: don’t panic
If you’ve found three or four suckers on a rose this week, you don’t have a serious problem. You have an early-May rose. Most healthy grafted bushes throw at least one sucker in their first three years, and many continue to throw the occasional shoot for the rest of their lives. The goal isn’t a sucker-free garden; it’s a steady, low-effort routine that catches them young and removes them properly so they don’t dominate.
A bush that’s “all suckered out” — where the entire base is rootstock and the named variety is reduced to a couple of weak twigs — is a different problem. That usually points to one of two things: a graft union that died back during a hard winter (in which case the rootstock has taken over because it’s the only living tissue left), or a plant that was sold with a weak union and was always going to fail. In either case, replacement is usually a better investment than rehabilitation.
How Cresco fits into a sucker-aware rose routine
Suckers aren’t on most generic gardening calendars. They sit between pruning jobs, get noticed when they’re already a problem, and the standard advice (“just snip them off”) quietly makes them worse. Inside Cresco, the system that already prompts you for the right moment to deadhead a lilac or pinch a sweet pea is the same one that flags rose maintenance windows in early May, late June, and again in late summer — the three points in the year when sucker activity peaks for most of north-western Europe.
The app pairs that calendar with photo-driven plant identification, so when you snap a picture of a suspect shoot, you’re not relying on counting leaflets. The plant gets matched to the named variety you logged when you planted the bush, and any growth that doesn’t fit the known variety pattern is flagged for closer inspection.
That’s the principle Cresco was built on: a generic gardening calendar tells you to “check your roses.” Useful gardening tells you to scrape down to the bud union of this specific rose, now, before the cambium hardens off and the bud cluster commits to firing again.
Quick reference: the rose-sucker checklist
If you’ve read this far, here’s the version you can take into the garden today.
- Walk every rose and look for shoots emerging at an awkward angle from the base
- Scrape soil and mulch back to expose the join between the suspect shoot and the rootstock
- Confirm the join is below the bud union — not above it
- Wear thorn-proof gloves and grip the sucker low, close to the rootstock
- Pull sharply downward and outward; don’t cut, don’t twist
- Check the base of what came off for visible cambium and bud points
- Pare off any obvious remaining bud points on the rootstock with a sharp knife
- Refill the soil, tamp gently, re-mulch, water lightly
- Don’t fertilise the spot for at least four weeks
- Check the same bush again in late June; if the area is clean, you’ve broken the cycle
Get that right once and the same sucker rarely comes back from the same point. Get it wrong, and you’ll be having the same argument with the same rootstock for the rest of the bush’s life.
The difference is one trowel and one tear.