Most people plant a climbing rose against a wall, hammer in a couple of vine eyes, and let the canes grow straight up. A few years later they’re staring at six metres of bare green stem with a small explosion of pink at the gutter. The fix isn’t more feed, a different fertiliser, or a sharper pair of secateurs. It’s bending the canes sideways while they’re still young enough to bend.
This guide walks through why horizontal training works, why now is the moment to do it, and exactly how to convert an upright climber into one that blooms from knee height to the top of the wall.
Why Vertical Training Fails
Roses, like nearly every flowering plant, are governed by a hormone called auxin. Auxin is produced at the growing tip of every shoot and travels downward, suppressing the growth of side buds along the way. The technical name is apical dominance. The practical effect is that an upright shoot pours all its energy into extending the tip, while every dormant bud below it stays dormant.
Tilt that same shoot toward horizontal, and auxin’s downward flow gets disrupted. The tip is no longer the highest point on the cane. Each lateral bud along the stem now sees itself as a potential new leader, and most of them break and grow. On a rose, those new lateral shoots are exactly what you want — because every one of them ends in a flower.
This is why a vertically tied climber gives you a lonely flower or two at the top, and why a horizontally trained one gives you a wall of bloom. The plant is the same. The hormones are the same. Only the geometry has changed.
The effect is strongest when the cane is held truly horizontal. A 45-degree diagonal still helps, but the difference between a horizontal cane and a vertical one is dramatic. Every serious rose nursery — David Austin, Peter Beales, Heirloom — gives the same advice for the same reason. The RHS guidance for May puts it bluntly: tie in climbing and rambling roses as near to horizontal as possible.
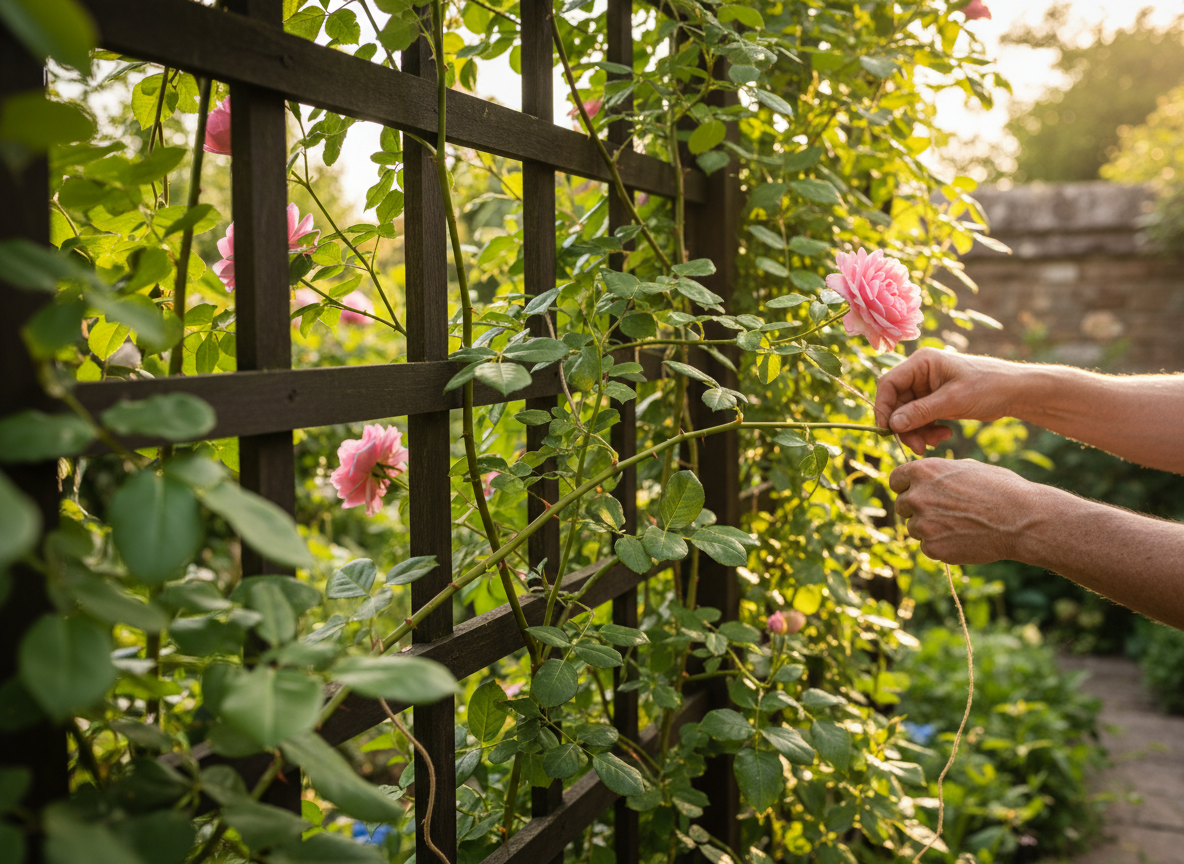 Hands tie climbing roses to a trellis — AI-generated illustration
Why Late Spring Is the Right Moment
You can technically tie in a climbing rose at any point in the year, but late April and May are the window where the work is easiest and the plant responds best.
Two things converge in this period. The new canes that grew last summer are now mature enough to be tough, but the current season’s growth is still pliable and green. Bend a fully ripened, brown cane sideways in February and it snaps. Try to bend a soft, sappy June shoot and it kinks. The window in between — roughly when the leaves are fully out but before flowering really gets going — is the goldilocks zone for shaping a climber.
The plant is also actively growing, which means any cuts you make to clean up dead or damaged wood will heal fast, and any tie-in you do now is followed immediately by a flush of lateral growth. By June, those laterals are putting on buds. By July, you have flowers all the way down the cane.
Wait until autumn and you’re working with stiffer wood, the plant is shutting down rather than responding, and you’ve missed the bloom benefit entirely for the year. Wait until winter and you’re back to canes that snap.
Setting Up the Support Before You Touch the Plant
A climbing rose isn’t actually a climber in the botanical sense. It has no tendrils, no twining stems, no aerial roots. It’s a vigorous shrub that has been bred to throw long flexible canes, and it relies entirely on you for support.
If your rose has been tied to a single trellis panel or a few random vine eyes, fix the support before you fix the plant. The standard arrangement is horizontal strain wires running across the wall or fence, spaced about 30 to 45 cm apart vertically and held to the surface by vine eyes. The wires want to be at least 5 cm clear of the wall so air can circulate behind the canes — black spot and mildew thrive on still air against warm brick.
Galvanised wire 2 mm thick is enough for most climbers. Use a turnbuckle on one end of each wire so you can tighten it as the canes get heavier. Stretch each wire taut enough that you can pluck it like a guitar string. A sagging wire becomes a sagging cane in two years.
For pergolas, arches, and obelisks, the principle is the same: the cane needs something to be tied to at regular intervals along its length, not just at the top and bottom. A bare post with two ties at the ends will give you exactly the lonely-tuft-of-flowers result you’re trying to avoid.
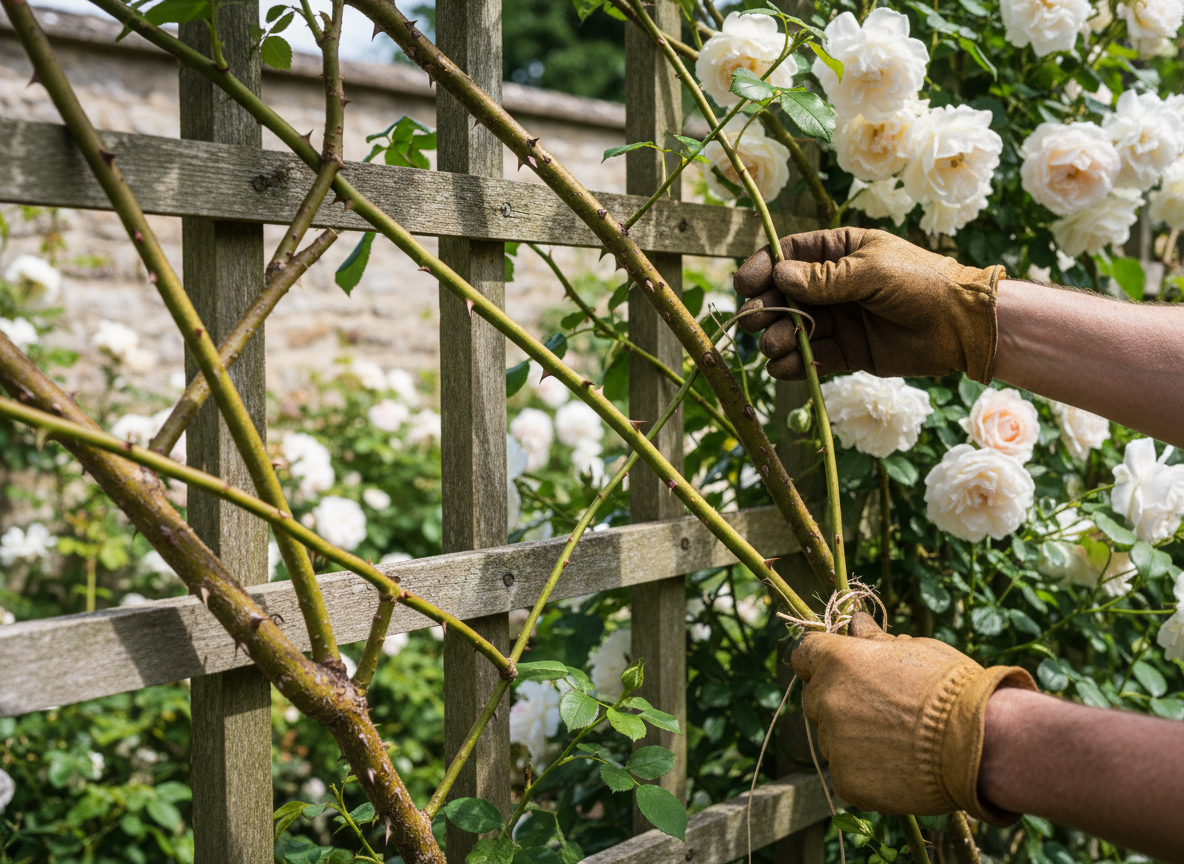 A person ties rose canes to a wooden trellis — AI-generated illustration
Choosing Which Canes to Keep
Stand back from the rose for a minute before you start tying. You’re looking at the structure, not the leaves.
A healthy mature climber wants between five and seven main framework canes, fanned out from the base. More than that and they start crossing, shading each other, and producing weak laterals. Fewer and you don’t fill the wall.
Identify the canes you’ll keep. The best framework canes are:
- Last year’s strong new growth from low on the plant. These are usually green or red-tinged, finger-thick or thicker, and supple. They’ll be your best flowering wood for the next two or three years.
- Two-year-old canes that are still vigorous. These already have lateral spurs and will flower hard this season.
- Anything growing in roughly the right direction for the support you’re training onto.
Remove, at the base, anything that is:
- Dead, brown, or hollow when you nick the bark with a thumbnail
- Crossing or rubbing on a cane you want to keep
- Older than four years and producing thin, weak laterals
- Growing straight out from the wall with no way to be tied flat
Older climbers can be rejuvenated over two or three seasons by taking out one or two of the oldest canes each year and training a new basal shoot in to replace them. Don’t try to do it all at once — a rose stripped to brand-new wood will sulk for a season before it flowers again.
The Tying-In Itself
This is the part most people overcomplicate. Once your framework is chosen, the actual technique is straightforward.
Start with the lowest cane and work up. Bend it gently along the bottom wire, anchoring it at intervals of roughly 30 to 40 cm. The bend should be a smooth arc, not a sharp angle — if you hear a creak, ease off and pick a slightly less aggressive line. A cane that has been kinked will die back from the kink down.
For the tie itself, use soft jute twine, dedicated rose ties, or stretchy plastic ties like Flexi-Tie. The classic technique is a figure-of-eight: loop the tie around the wire, cross it between the wire and the cane, then loop around the cane and knot. The cross prevents the cane from rubbing directly against the wire, which abrades the bark and lets disease in.
The tie wants to be firm enough that the cane doesn’t slide along the wire in a gust of wind, but loose enough that you can slip a fingertip between the tie and the bark. Canes thicken every year. A tie that fits snugly in May will be cutting into the cane by August if it’s a hard plastic loop. Soft, slightly stretchy materials are forgiving in a way that wire and zip-ties are not.
Work along the cane to the tip, then move up to the next wire and the next cane. Fan the canes out so they radiate from the base, with the lowest canes most horizontal and the upper canes at progressively shallower diagonals. Don’t stack canes on top of each other on the same wire — each one wants its own line.
By the time you’ve finished, the rose should look like an open hand against the wall, with fingers spread wide and the lowest two almost flat. That shape is what produces the bloom-from-knee-height effect.
What to Do With Last Year’s Flowering Laterals
Once the framework is tied in, look at the side shoots — the laterals — that grew off your main canes last year. These are the small, finger-length branches that produced flowers last summer.
Cut each lateral back to two or three buds from the main cane. That’s roughly 10 to 15 cm. The buds you keep will produce this year’s flowering shoots; the wood you remove was already going to be replaced anyway.
This is the one bit of pruning that gets done at the same time as the tying-in, and it matters because un-pruned laterals tend to extend further along their length and bloom only at the tips. Cut back hard and you concentrate the flowering close to the main cane, where you actually see it from the patio.
If you’re not sure which is a lateral and which is a main cane, the rule is simple: anything growing off another cane is a lateral. Anything growing from the base of the plant is a main cane. Main canes get tied in. Laterals get shortened.
Common Mistakes That Cost You Bloom
A few patterns come up over and over with climbing roses, and any of them can undo the benefit of horizontal training.
Tying with wire or zip-ties. These cut into the cane as it thickens, ringbark the wood, and kill everything above the cut. Always use a soft, slightly stretchy material. If you’ve inherited a rose tied with old wire, the first thing to do is replace every tie before you touch anything else.
Tying too tight. Even soft twine can choke a cane in a season if it’s bound on like a parcel. The fingertip rule — you should be able to slip a fingertip between the tie and the bark — gives the cane room to thicken without strangling.
Sharp bends. A cane folded at 90 degrees to fit the geometry of a fence panel will die back from the bend. Smooth arcs only. If the cane won’t follow the support without kinking, it’s the wrong cane for that position.
Tying canes vertically because there’s no horizontal option. If your support genuinely doesn’t allow horizontal training — narrow obelisks, single posts, pillars — accept that you’ll get less bloom and pick a variety bred for the situation. Repeat-flowering shrub roses on a pillar will give you more flowers than a true climber tied straight up.
Ignoring the back of the plant. On a wall, every cane needs to face out, not press against the brick. A cane trapped behind another cane gets shaded, develops mildew, and produces nothing. When in doubt, untie and re-fan.
Re-using last year’s ties. Ties stretch and rot over winter. Walk along every tie in spring and either replace it or tighten it. A flapping cane in a June thunderstorm tears at the bark and breaks at the next anchor point up.
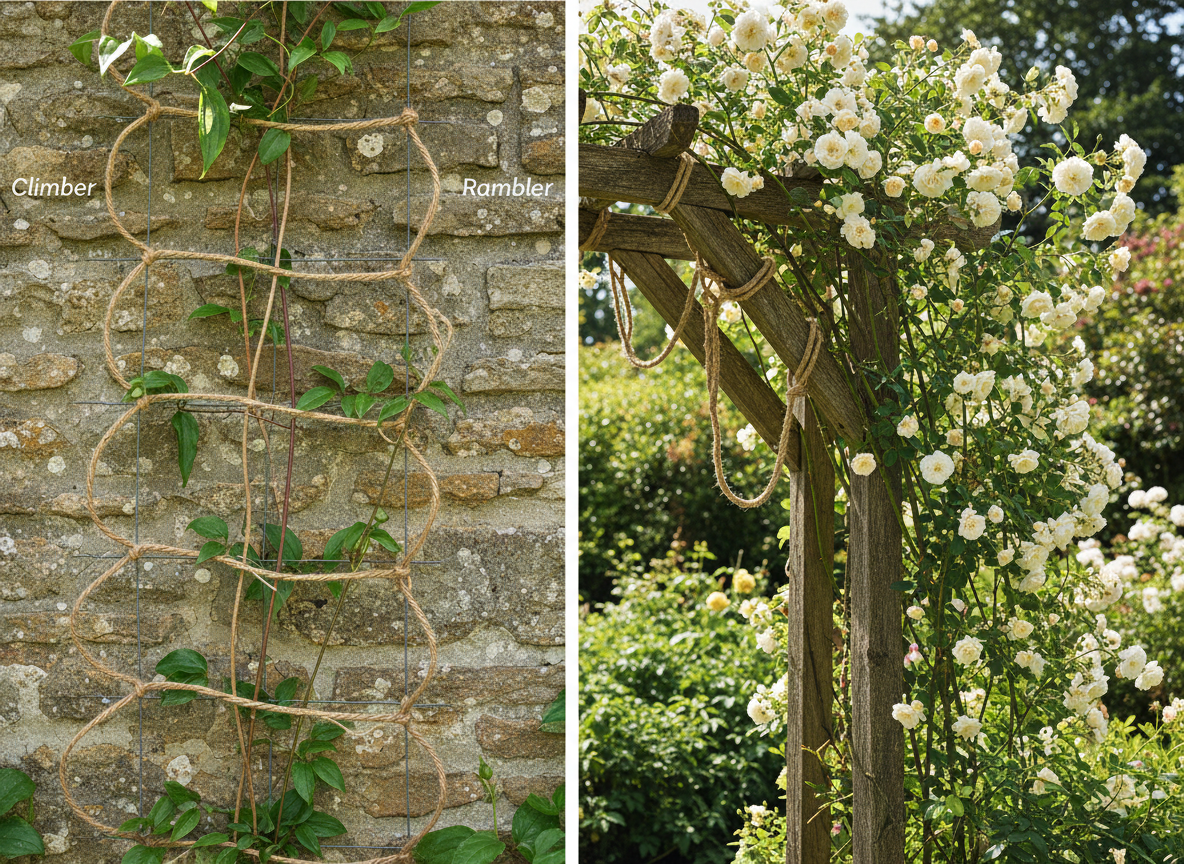 The photograph depicts a clematis climber on a trellis and a rambler rose on an arbor — AI-generated illustration
Climbers vs Ramblers: Different Plants, Different Rules
Most of what’s been said so far applies to repeat-flowering climbers — the David Austin “Generous Gardener”, the Kordes “Florentina”, the classic “New Dawn”. They flower on this season’s growth from a permanent framework, which is exactly why horizontal training pays off so well.
Ramblers behave differently. A true rambler — Wedding Day, Rambling Rector, Paul’s Himalayan Musk — flowers once a year, on long whippy canes that grew the previous summer. The plant produces vast quantities of new growth from the base, flowers it the following June, and then those canes are largely spent.
For ramblers, the right approach is to tie in this year’s new growth as it appears, encourage it horizontally over arches or pergolas, and after flowering cut the oldest canes out at the base to make room for next year’s. Trying to maintain a tidy permanent framework on a rambler is fighting the plant’s nature.
If you’re not sure which you have, the easiest tell is the bloom pattern. A climber that’s been flowering on and off from June to September is a repeat-flowering climber. A rose that puts on one explosive show in midsummer and then goes quiet for the rest of the year is a rambler.
The horizontal principle still applies to both — auxin works the same in any plant — but the timing of the framework decisions differs. Climbers get a permanent set of canes you maintain for years. Ramblers get a rolling cycle of new canes replacing old ones.
What This Looks Like Three Months Later
A climber tied in horizontally in late April produces visible new lateral shoots within two to three weeks. By mid-May those shoots are 10 to 20 cm long and putting on their first buds. By June, the entire length of every horizontal cane is studded with flowers, often more than the plant has produced in any previous year.
The change is dramatic enough that most people who do it for the first time take photos in early July and compare them to the previous summer. The same plant. The same wall. Sometimes a difference of three or four times more flowers, distributed across the whole plant rather than clustered at the top.
In subsequent years the work gets easier. Once the framework is established, you’re maintaining rather than rebuilding — replacing one or two canes per season, shortening last year’s laterals, and tying in the new basal shoots that will become next year’s flowering wood.
The climber that gives you a wall of flower and the climber that gives you a sad tuft at the gutter are not different plants. They’re the same plant managed differently.
The Timing Question Cresco Was Built For
Climbing roses are a good example of a plant where the work itself is straightforward but the timing decides whether the work pays off. Tie in the canes at the right point in spring and you get a transformed plant. Do the same work in August and you’ve achieved nothing for the current season; do it in February on a frosty morning and you’ll snap canes you needed.
The window also moves. In a warm spring, your climber is flexible by mid-April and putting on lateral growth by early May. In a cold late spring, you’re still in the bend-or-snap phase well into May. There’s no fixed calendar date that works across years.
This is exactly the kind of timing problem we built Cresco to solve. The app knows your specific climber, knows what the local weather has been doing, and prompts you when the canes will be supple, the leaves are out, and the bloom benefit is highest. It also knows the difference between a climber and a rambler, and won’t tell you to maintain a tidy framework on a plant that’s better managed by replacement.
For a job where doing it in the right two-week window can mean three times the flowers, that kind of timing intelligence is the whole point.
What to Do This Week
If your climbing rose is leafy, the new shoots are still flexible, and the wall behind it is still bare of bloom, here’s the short version:
- Check and tighten the support wires. Replace any that sag or rust.
- Identify the five to seven main canes you want to keep. Cut everything else out at the base.
- Working from the bottom up, bend each cane along its support wire and tie it with soft, stretchy ties at 30 to 40 cm intervals. Aim for horizontal on the lower canes, shallow diagonals higher up.
- Cut last year’s laterals back to two or three buds from the main cane.
- Replace any old wire, twine, or zip-ties from previous years.
- Stand back, look for canes you’ve stacked or kinked, and re-fan as needed.
Two hours of work in late April pays off in flowers from June to September. The plant doesn’t need anything fancy — just the right angle at the right time.
Want a pruning and training plan that knows when your specific climbers and ramblers are ready for tying in, and when the local conditions are right for the work? Try Cresco at cresco-pruning.com.